Learn how tattoo stencil paper works, the three main types, how to apply it, and why it is single use. A clear, artist-led guide from Nadine Harvey.
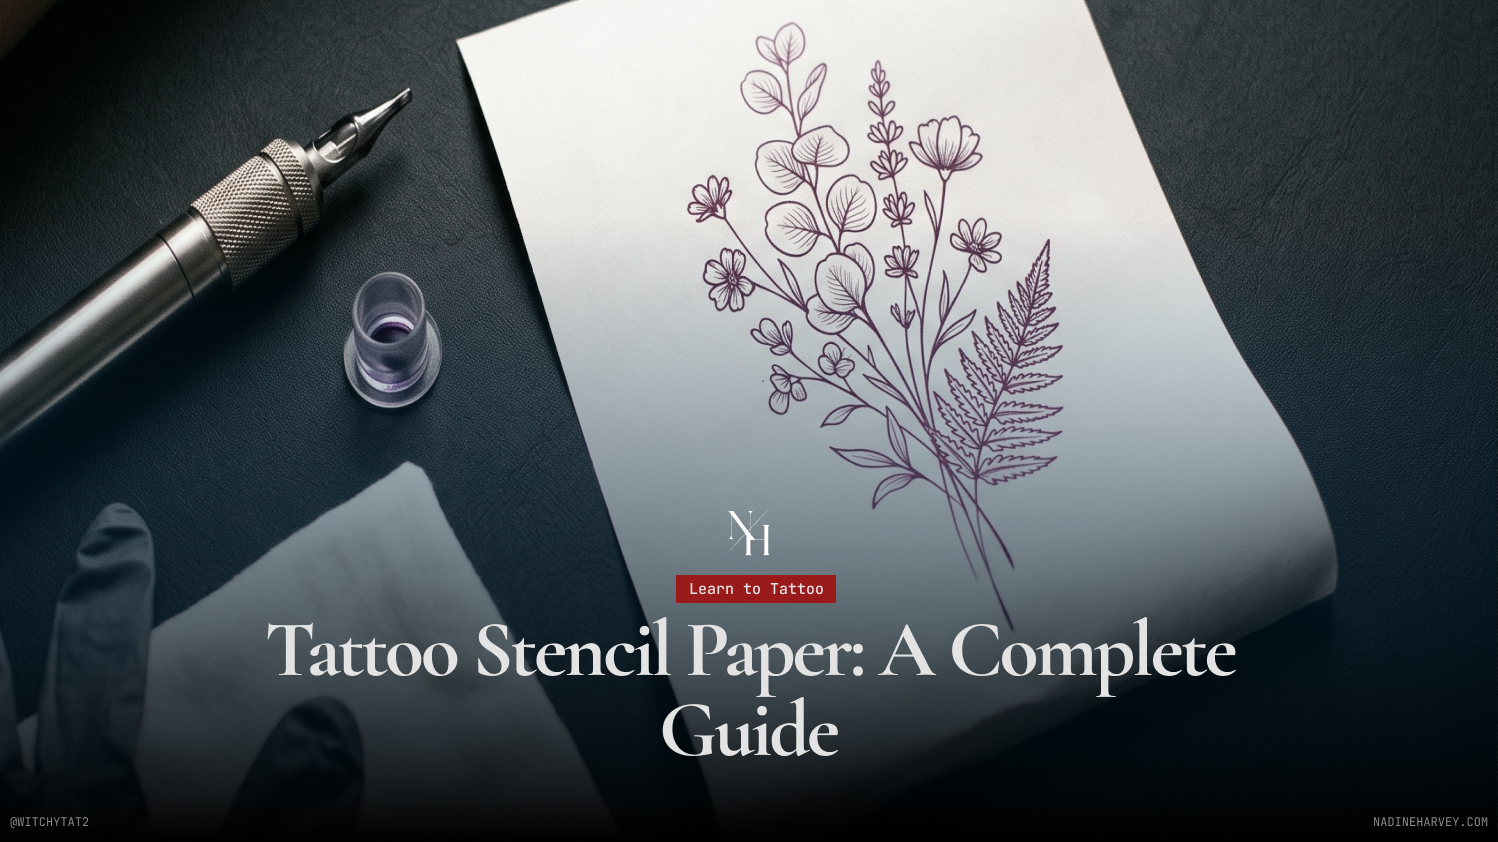
A tattoo starts long before the needle. It starts with the stencil. The stencil is the outline your artist follows on your skin. If it transfers faint or smudged, the final lines suffer.
This guide explains what stencil paper is and the types available. You will learn how it works, how to apply it, and why it is single use. You will also see how Nadine Harvey uses stencils in her hand-drawn process.
Tattoo stencil paper is a layered sheet that copies a design and moves it onto skin. It gives the artist a clear outline to follow before tattooing. That outline is called a stencil. A dark, crisp stencil leads to clean lines. A faint one leads to shaky work and touch-ups.
Tattoos are more common than ever. About 32% of U.S. adults have at least one, and 22% have more than one, according to Pew Research Center. That is a large group trusting artists with permanent work.
Tattooing is serious, skilled work. The U.S. tattoo artist market was about 1.3 billion dollars in 2024, per IBISWorld. Process and care matter at that level.
The stencil is the first quality checkpoint. It locks in size, shape, and placement. It also lets you approve the design on your body before ink.
Your artist follows the stencil line for line. A clean stencil means steady, confident work. You can see the payoff of careful placement across Nadine’s tattoo portfolio.
“The stencil is my last chance to change something for free. Once a client and I approve it, I know the placement is right before I start.” Nadine Harvey, Tattoo Artist
There are three main types of tattoo stencil paper: thermal, hectograph, and carbon. Thermal paper prints from a machine and is the studio standard. Hectograph, also called freehand paper, suits hand-drawn designs. Carbon or tracing paper is a simple manual option. Your choice depends on whether you draw by hand or print digitally.
Most artists start with the two main options: hectograph and thermal. A third manual option, carbon or tracing paper, rounds out the group. Each fits a different workflow.
| Type | Who It Fits | Key Strength | Watch Out For |
|---|---|---|---|
| Thermal | Artists printing digital designs | Sharp, dark, durable lines | Needs a thermal printer, costs more |
| Hectograph (freehand) | Hand-drawn stencils | No printer needed | Lower clarity on fine detail |
| Carbon / tracing | Quick or travel work | Cheap and portable | Fades faster, manual tracing |
Carbon color affects the result. Purple carbon transfers darker and lasts longer than blue. Choose purple for detailed or long pieces.
Thermal stencil paper has four layers. A top sheet holds the design. A thin milky onion sheet separates the layers. A carbon layer forms the stencil. A yellow backing adds stability. Hand-drawn hectograph paper usually has three layers. Knowing the layers helps you load and use the paper the right way.
Each layer has one job. Understanding them prevents most transfer failures.
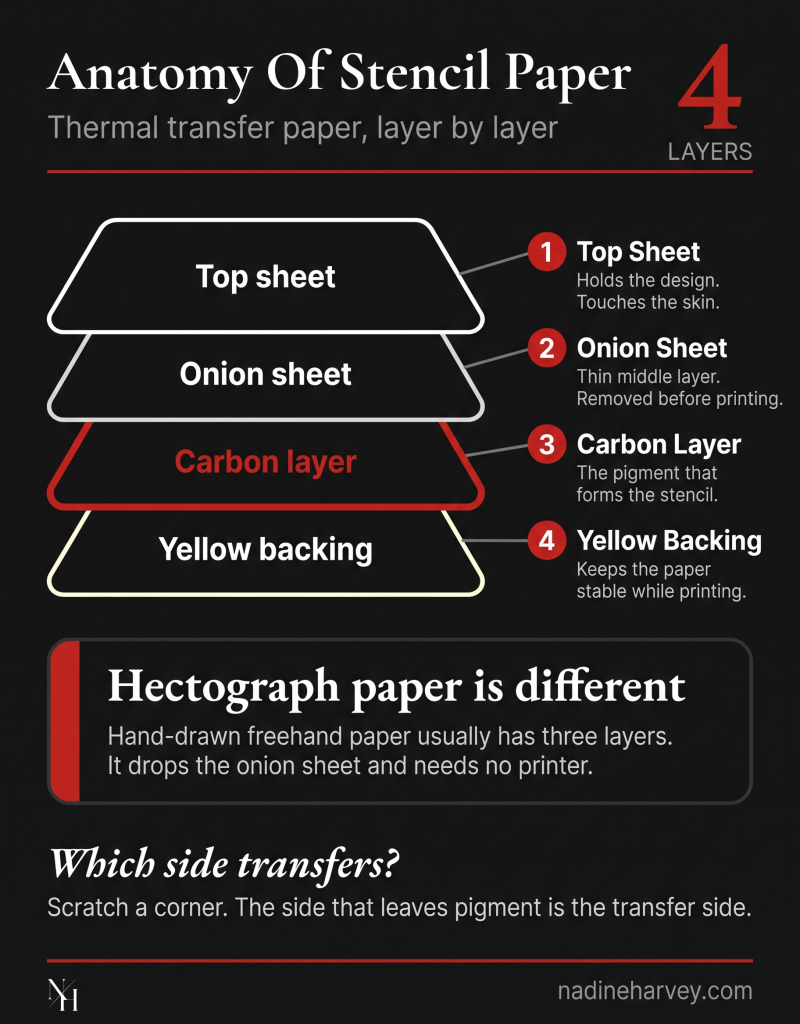
Thermal paper has four layers:
Hectograph paper drops the onion sheet and uses three layers instead.
A common mistake is leaving the onion sheet in during printing. Another is loading the paper upside down. Both give a blank or faint transfer. A quick test helps. Scratch a corner. The side that leaves pigment is the transfer side.
To apply a stencil, prep the skin, add gel, press the paper, then let it dry. Clean and shave the area first. Apply a thin, even layer of stencil gel. Press the paper with flat palm pressure. Peel from one corner. Let it dry 15 to 20 minutes before the first line.
Application decides whether the stencil survives the session. Rushing this step is a top cause of smudged lines.
Follow these steps:
That drying window comes straight from working tattoo educators. Skipping it invites smudges.
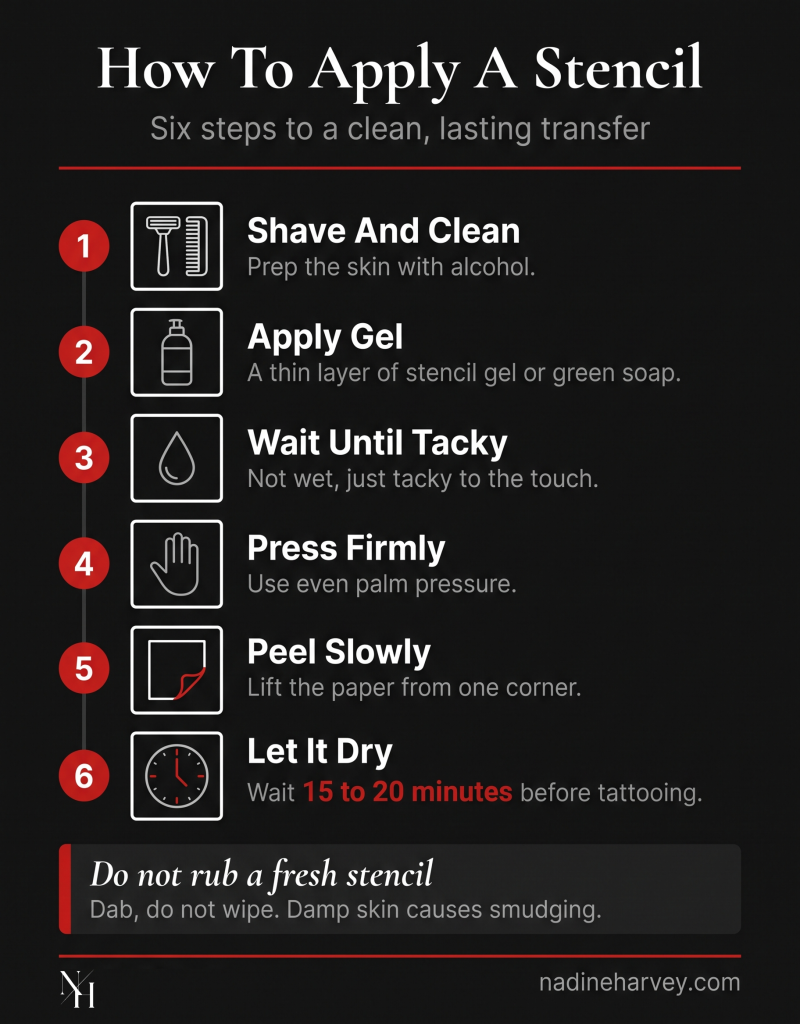
“I never rush the dry time. If I start on damp skin, the outline smears within minutes and I lose the whole stencil.” Nadine Harvey, Tattoo Artist
Do not rub across a fresh stencil. Dab, do not wipe. A thin layer of ointment over the stencil protects it while you work. Damp skin causes smudging, so let the gel set first.
Paper stencils are single use only. A studio uses a fresh stencil for each client, then throws it away in a hazardous waste bin. This prevents cross-contamination. Reusable acetate stencils must be disinfected after every use. Single-use practice is both a safety rule and a sign of a careful studio.
Tattooing breaks the skin, so hygiene is not optional. OSHA’s Bloodborne Pathogens Standard applies to tattoo studios. The CDC also sets body art safety guidance.
Health training standards are clear. Paper stencils are one-time use and go in the hazardous materials bin. No exceptions.
“I open a fresh sheet in front of every client. A clean single-use stencil is the simplest way to show a studio takes hygiene seriously.” Nadine Harvey, Tattoo Artist
You can tell a careful studio by its small habits. Watch for these signs:
Choose stencil paper by quality, not just price. Spirit thermal paper runs about 0.60 to 1.00 dollars per sheet. Generic and carbon sheets cost 0.10 to 0.40 dollars. Cheap paper often prints faint and wipes off early. Store all paper flat, dry, and out of sunlight to keep it usable.
Price and quality track closely here. The gap in cost per sheet is small, but the gap in results is large, based on supply pricing data.
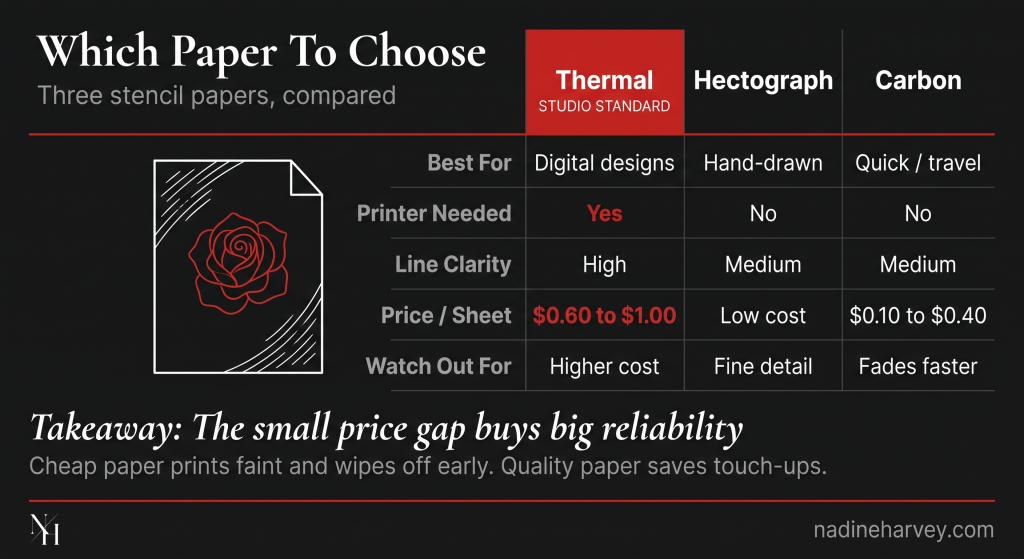
A few common errors waste paper and time:
Store opened packs in a sealed bag. Keep them flat in a cool drawer. Small habits protect your supplies.
Nadine Harvey draws every design by hand before it reaches skin. The stencil is where that drawing meets your body. She uses it to check size, flow, and placement with you first. Nadine works from a private studio in Huntington Beach and takes limited bookings each month, so each stencil gets full attention.
Nadine has eight years of hands-on experience. Her work spans black and grey realism, fine line, anime, horror, and illustration. Her tattoo and editorial modeling work has appeared in i-D, Dazed, Nylon, and Paper.
The stencil step is where she and the client align. You see the design on your skin. You adjust placement before anything is permanent. That pause is part of the calm, careful process.
Placement often shifts once a design sits on the body. A piece that looked centered on paper may need a small turn on the arm. The stencil makes that fix easy and free. Ink does not.
You can learn more about Nadine and her editorial modeling work. If you want to plan a custom piece, you can book a consultation to start with a hand-drawn design.
A stencil is small, but it decides a lot. It sets your lines, your placement, and your first honest look at the design. The right paper transfers dark and holds through the whole session.
For clients, a fresh single-use stencil signals a careful, safe studio. For artists, quality paper saves time and touch-ups. Either way, the stencil deserves attention. Treat it as the first real step of the tattoo, because it is.
No. Paper stencils are single use. Your artist uses a fresh sheet for each client, then throws it away. This keeps the process clean and safe.
Only for thermal paper. Thermal paper needs a thermal printer. Hectograph and carbon paper work by hand with a pen or stylus.
About 15 to 20 minutes. A dry stencil holds through the session. A damp one smudges as soon as the work starts.
Common causes are damp skin, cheap paper, or rubbing the area. Let it dry fully. Dab instead of wipe. Use quality paper and gel.
Often yes. It prints darker and lasts longer than generic sheets. For client work, that reliability saves touch-ups and time.